Fun Ways to Use Cricut Iron-on Designs
/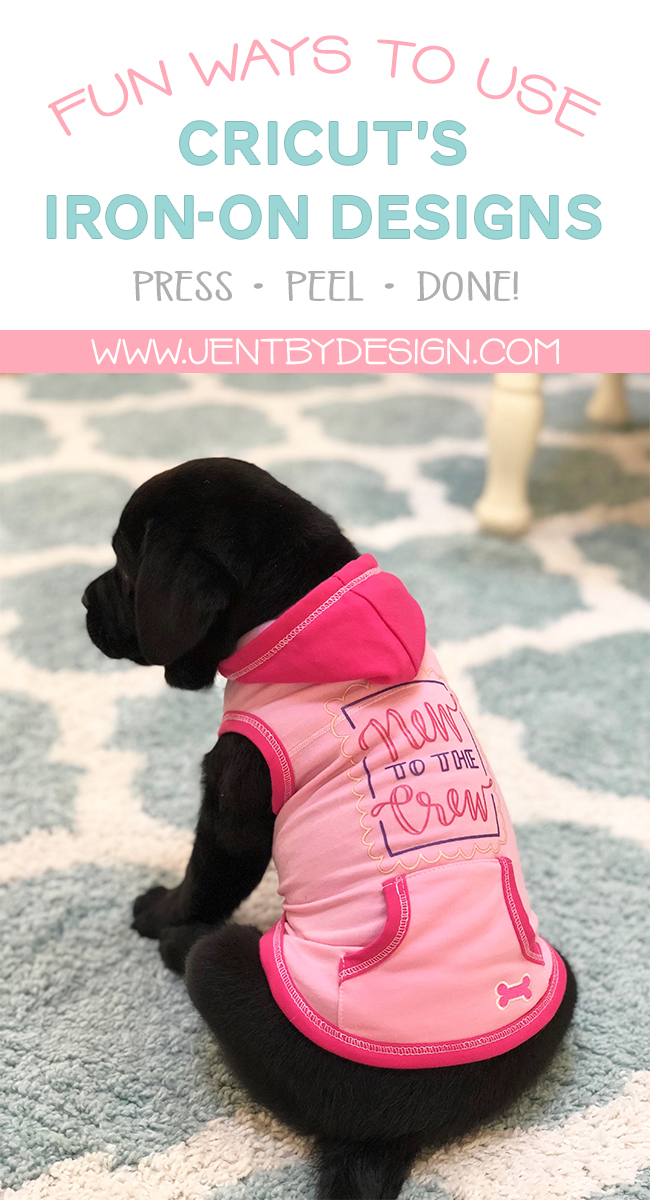
Meet Banks, our daughter's new English lab puppy {and our newest obsession}! She is sweet, fluffy, curvy, and so darn adorable! (I mean, just look how she fills out that outfit...can you even handle it)?!!
And while we're talking about the outfit...is it not the cutest?!!! You guys, I made it, in minutes, using the new Cricut Iron-on Designs!

There are over 50 designs available for all different interests, with more coming soon! This is just a peek at some from the kids/baby line. SO cute, right? See more designs here.
You're definitely not limited, though. If you want to kick things up a notch and put your own touch on these, you can totally customize them with your own designs cut from your Cricut machine. The possibilities are endless!

Most people think onesies, bibs, tote bags, and pillows when they see these, but when I saw the "New to the Crew" design, I immediately thought of Baby Banks! She's new to the crew, and just look at her. She realllly wanted something cute to wear! It was perfect!
So, I made her this little outfit, and then I also made her a bandana because I just. couldn't. stop! Take a peek below to find out how you can make something, too!
How to Make a Puppy Bandana and Outfit Using Cricut Iron-on Designs

What You'll Need:
- The Cricut Iron-on Design(s) of your choice (the ones I used here will be available online soon)!
- A plain white bandanna
- A puppy outfit (I scored this one on clearance at Petco)
- An iron or EasyPress (Sidenote: I love the EasyPress for so many reasons, but mostly because the heat is much more consistent than an iron, and it tells me exactly what temp I need and how long I need to press it based on the materials that I'm using...there's no guessing! After too many mistakes with an iron, the EasyPress has been a dream)!
- An EasyPress Mat or a towel to protect your work surface (Another sidenote: I used to use a towel on my counter top and switched to the EasyPress Mat. What a difference! Not only does it protect the work surface, but it is cushioned [which was so good for pressing around the chunky seams in the puppy outfit I used below], and it helps eliminate any moisture so you get a super amazing adhesion every time)!

What To Do:
The projects only take four simple steps and a few minutes to complete.
Before you begin, choose a work surface (like a counter top) and protect it with a towel that's been doubled over, or use an EasyPress Mat.
1. PREHEAT: Preheat your iron or EasyPress to the recommended setting for the materials you are using. If you are using an EasyPress, find the recommended settings here: https://help.cricut.com/easypress-recommended-settings. Once the desired temp is reached, warm the area where you will be applying the iron-on design following the instructions on the back of the iron-on design package.
2. PLACE: Place the iron-on design onto your project.
3. PRESS: If you are using an iron, follow the instructions on the back of the Iron-on Designs package. If you are using an EasyPress, follow the instructions for either a towel or the EasyPress Mat in the recommended settings: https://help.cricut.com/easypress-recommended-settings. Turn the project over and press the back side. (I pressed for 15 seconds).
4. PEEL: Let the project cool completely. Peel the plastic carrier sheet away. (This is called a cold peel).

That's all there is to it! SO easy, right? And just look at that baby! Gah. Can you even stand the cuteness?!!
If you want to make the bandanna, you just follow the same simple steps. Here's a peek at how that turned out:

The bandanna I bought was too big for her chest, so we just swung it around to the back. Too darn adorable for words!
How to Care for Your Project:
Wait 24 hours after application to wash
Turn inside out before washing and drying
Do not bleach
Iron inside out

Baby Banks and I hope we've inspired you to create something fun for your fur baby...or any baby, for that matter. ;) Be sure to share pics and tag me on social media, if you do. I love seeing what you create!
Until next time, hugs from me and the pup!
If you like these ideas, please "Like," "Pin," "Share" or "Tweet!" Or, you can just shout it from the rooftops, if that's your thing. Thanks bunches!!! :)
This is a sponsored conversation written by me on behalf of Cricut. The opinions and text are all mine. Affiliate links are included in this post, which means If you purchase something through the link, I may receive a small commission at no extra charge to you.