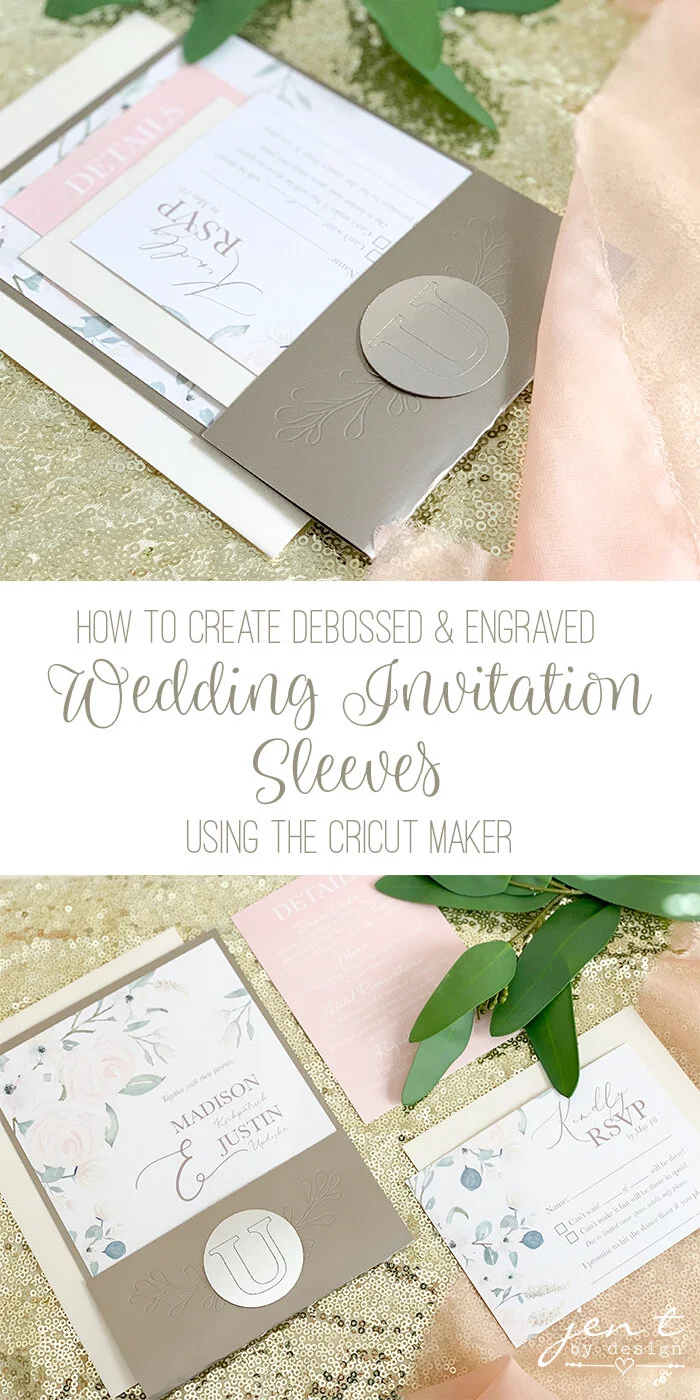
How to Create Wedding Invitation Sleeves Using the Cricut Maker
/This is a sponsored conversation written by me on behalf of Cricut. The opinions and text are all mine. Affilate links are included in this post, which means if you purchase something through a link, I may receive a small commission at no extra charge to you.
The thing I love most about weddings is seeing how the bride and groom’s personalities and interests get infused into the wedding decor. It’s so cool to see all of the different styles and decorating ideas customized to fit the couple, don’t you think?
If you’ve been following along with me at all, either here on the blog or on social media, you know that we had two of our kiddos get married within 7 months of each other over the past year. It’s been a whirlwind year to say the least!
We used the heck out of both my Cricut Explore and my Cricut Maker to create absolutely perfect wedding decor for each kiddo’s special day…customized to fit each of their personalities. It’s those little, customized details that make the celebration so special!
When Cricut launched the Cricut Maker two years ago, it promised that new tools capable of cutting an array of materials would be coming down the pike. They released the knife blade which allowed me to create this incredible farmhouse sign for my daughter’s wedding, and they also released two scoring wheels that I used to create some customized Christmas gift tags.
They’ve recently released four new Maker Tools to take all of your creative projects to the next level, and they are AMAZING! I was fortunate enough to have Cricut send me the new tools to try out, and since it’s wedding season and I have weddings on the brain, I thought I’d show you how to use these tools to create some customized Wedding Invitation Sleeves.
For this project I’ll show you how to use the Fine Debossing Tip (which adds professional polish and elevated elegance to your paper crafts) and the Engraving Tip (which allows your to inscribe your own personal touch into your creations). These tools are mind blowing, y’all, and I’m so excited to show you how they work!
To Make these Wedding Invitation Sleeves You Will Need:
This project in Cricut Design Space
Your wedding invitation suite
Cricut Maker Tools (Fine Debossing Tip, Engraving Tip, Double Scoring Wheel, Fine Point Blade). The new tools are part of an Adaptive ““QuickSwap” Tool System, so you only need one housing and you can easily switch out the blades.
Foam adhesive circles (I call them pop dots, but they’re basically adhesive foam circles that give your projects a little bit of dimension)
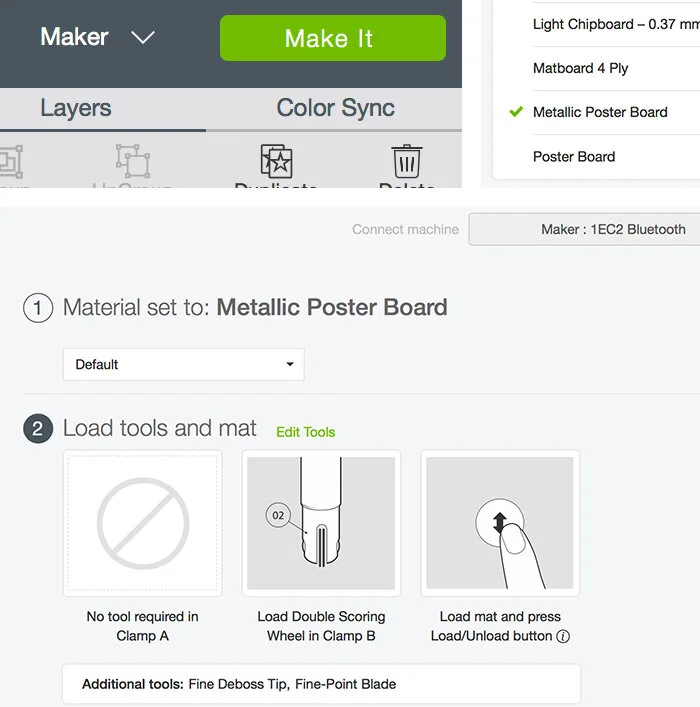
To begin, open the project in Design Space. Connect your Maker and select the material that you will be using for the wedding invitation sleeve. I used the Cricut Metallic Posterboard.
Design Space will guide you through the project by showing prompts on your computer screen. The process is really so easy!
You will first be prompted to load the Double Scoring Wheel. Secure your posterboard to the cutting mat and press the blinking arrow button to load the mat. Once properly loaded, press the blinking “C” to begin scoring.
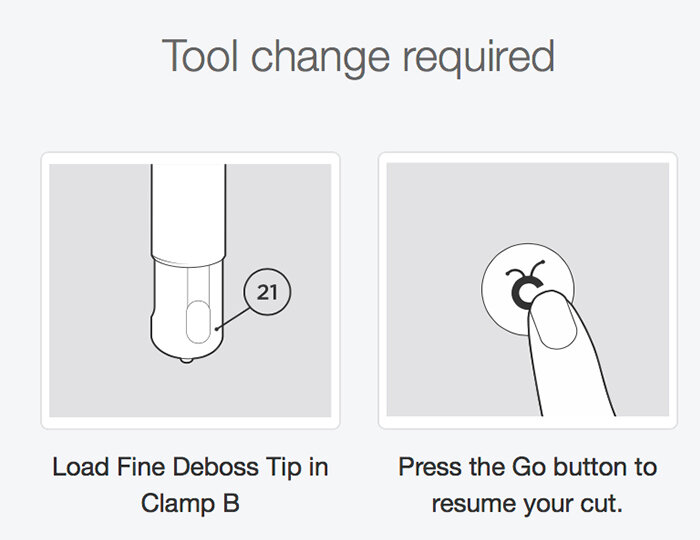

You will then be prompted to load the Fine Deboss Tip. Leave the mat in place.
What I love about the Maker is that it’s virtually foolproof. The machine can actually detect if you have the proper blade loaded, so if you accidentally load the wrong blade or forget to change it, the machine will let you know. SO AWESOME!!! Press the blinking “C” and watch the tool work it’s magic on your paper. It’s seriously so mesmerizing to watch!
Next you’ll switch to the fine point blade which will cut the sleeve out. Unload the mat.


Now it’s time to inscribe the initial for your sleeves. Secure the Foil Kraft Board to the mat and load the Engraving Tip into the machine. Follow the prompts to engrave.
Without unloading the mat, load the fine point blade into the machine and cut out the initial coin. Unload the mat.


Using the score lines, fold the sleeve so that the debossed design is at the bottom front of the sleeve.
Being sure to leave plenty of room for the invite to fit between the glued sides, apply two very thin lines of hot glue down the inside sides of the folded sleeve. Fold the sleeve and hold until secure.
Attach a foam adhesive circle to the back side of the engraved coin, then adhere it to the center of the debossed design.
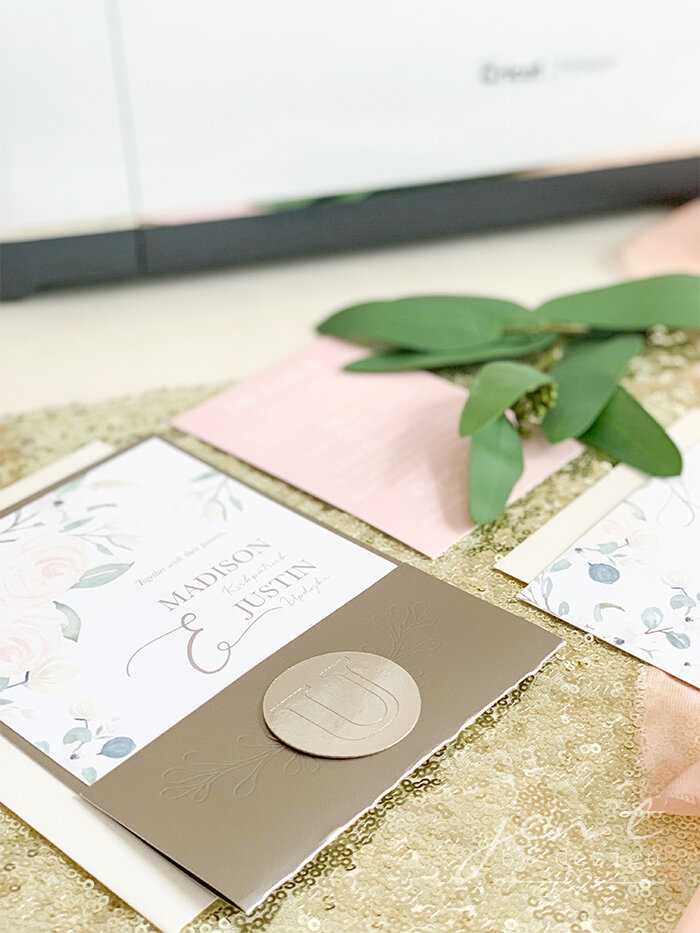
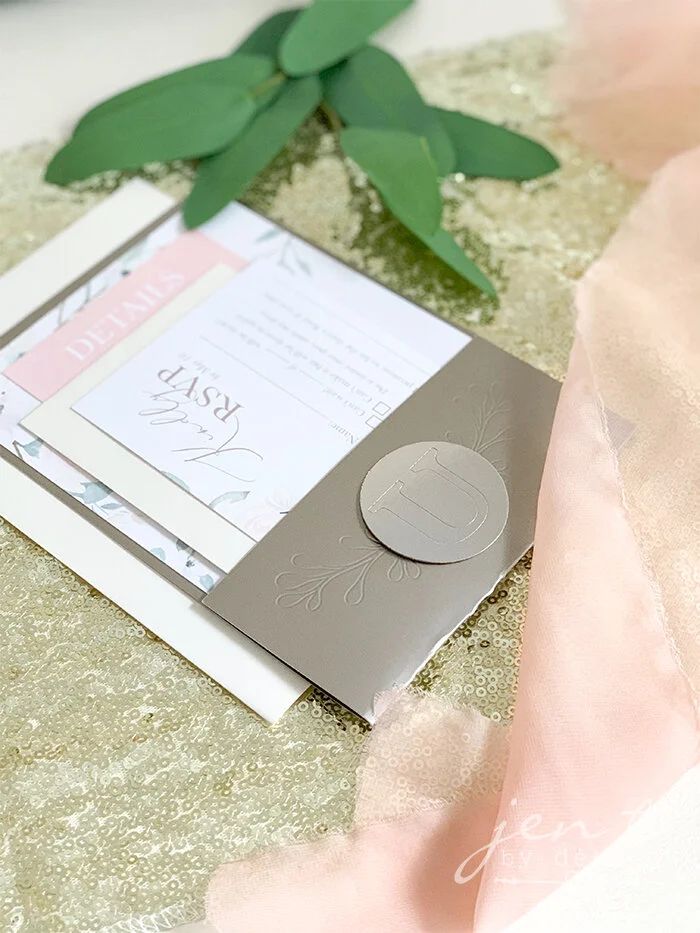

Layer your invitation suite inside the sleeve, then take a step back and admire your work. Doesn’t it look so good?!! Your guests are gonna love it!
If you decide to give this project a whirl, please share a pic with me by tagging me on social media (follow the links at the bottom of the page for my account handles). I absolutely love seeing what you create!
Until next time, happy celebrating! xoxoxo, Jen :)