5 Simple New Mom Gift Ideas using the Cricut Joy
/
Just in case you’re one of the few people who hasn’t heard me shouting it from the rooftops, we have a grandbaby on the way!!! Our daughter got married last year and is pregnant with our very first grand little and we couldn’t be more excited!
With her due date fast approaching, and with Mother’s Day right around the corner, I wanted to give my “soon-to-be-mama” baby girl something special to celebrate this incredible time in her life. You know I’m all about personal touches, so it will come as no surprise to you that I chose to “Cricut up” some custom goodies for her. What might surprise you, however, is what I used to do it!
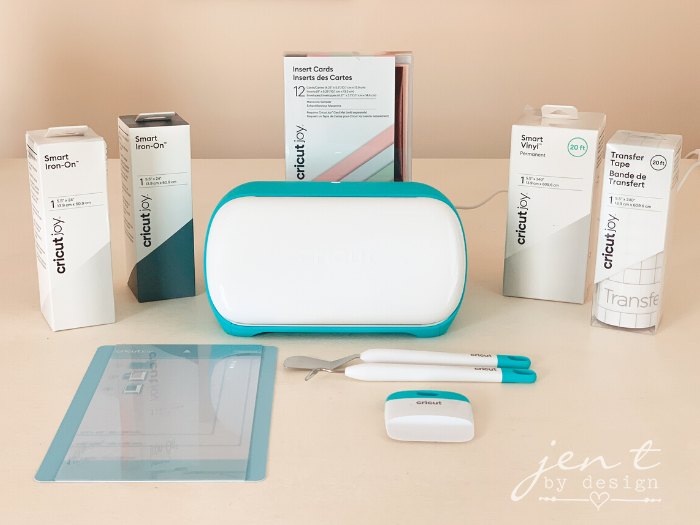
Let me introduce you to the newest member of the Cricut cutting family…the Cricut Joy! This machine is small but mighty, weighing in at less than four pounds! It’s cute, petite and portable, making it easier than ever to craft when and where you want.
If you already have a Cricut Maker or Explore Air 2, you might be wondering what benefit you would get from the Cricut Joy. Well, as someone who owns both a Maker and an Explore Air 2, let me tell you a couple of reasons why I love this little machine:
It literally allows me to create anywhere! I can take it down to my living room, plug it in, send a project to it from my phone, and cut it out within minutes…all while sitting in front of my TV. If I’m styling for an event, I can take it with me and create any last-minute touches right there on the spot. I LOVE that capability because I am notorious for wanting to add “one last detail” to a setup before go time! The Joy allows me to do that.
It’s ideal for small, quick projects! These gift ideas that I’m about to share with you are the perfect example. When you just need to make a quick cut with one color and don’t want to go hook up your big machine, just pull this baby out, send over the project via Design Space on your phone or tablet, and you have you can have your project complete in minutes…literally. Just cut, apply and you’re done. Honestly, it’s that simple. Need a quick decal? Done. Want to whip up a quick card for a last minute birthday gift? Easy peasy. Need to add a quick label to the dish you’re taking to the potluck? Done and done. The possibilities are endless!

One of the coolest things about the Cricut Joy is that mats are optional! No more wondering which mat is needed for which material, and no need to carry mats along with you when you take your Joy on the go. This machine has a full suite of “smart” materials that don’t require a mat…just load and go!
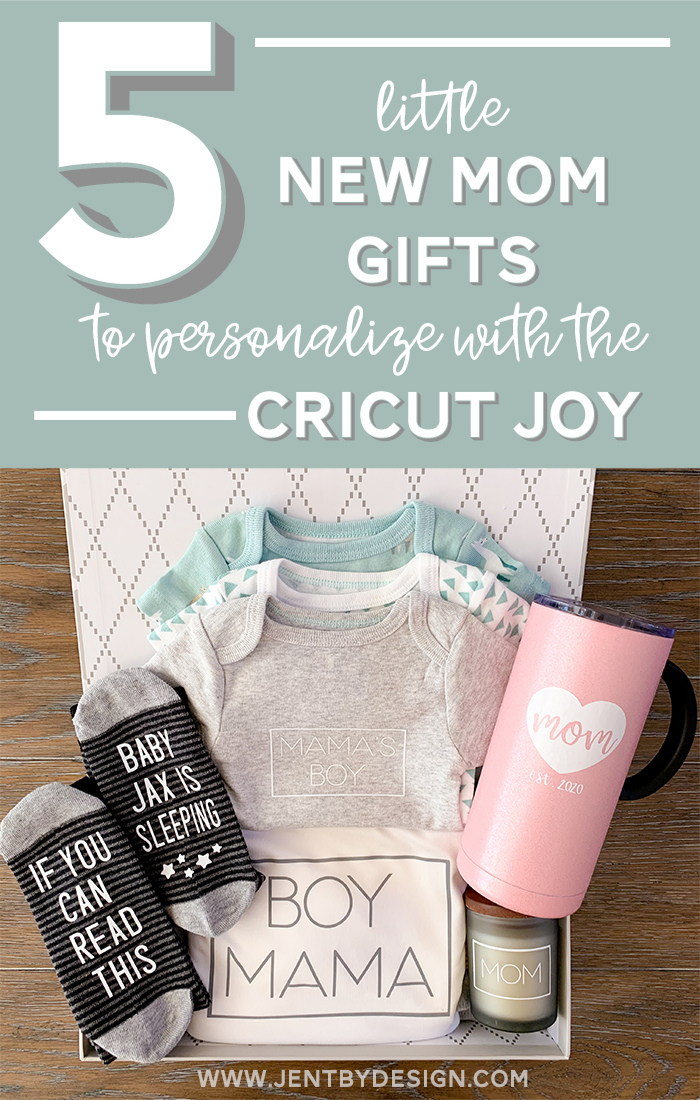
I didn’t use a mat for any of the goodies that I personalized in the pic above, and I customized all of those gifts combined in less than an hour. So amazing, right?
Take a peek below to learn how you can customize Simple New Mom Gift Ideas using the Cricut Joy!

Aren’t Mommy and Me Matching Shirts just the sweetest idea? I can already picture my daughter and my sweet baby Jax wearing these and looking so cute I could just eat ‘em up!

For the Onesie You’ll Need:
- Cricut Joy
- This project in Design Space
- A solid onesie (I chose grey)
- Cricut Joy Smart Iron-On (I chose white)
- Weeding Tool
- EasyPress or Iron

Begin by opening this project in Design Space and clicking “Customize.” Measure the width of the onesie to determine what size you’d like your design to be, then enter the design width in the top toolbar. Click enter and the height will adjust proportionately. Then click “Make It.”
Design Space will prompt you to choose the material that you will be cutting, will tell you to toggle the “Mirror” button to the on position, and then will prompt you to load the material and cut. No mat required with the Smart Iron-On!

After the cut is complete, use the weeding tool to peel away the negative vinyl.


Allow to cool for about a minute, then while still warm, peel away the carrier sheet.

Look how cute!

To make the mama’s shirt:

I wanted to include some useful gifts for the mom-to-be in the gift box, and cozy socks are always a good idea! Have you seen the socks on Pinterest that say “If you can read this, bring me some wine” on the bottom? Well, when the new mama is able to get the baby to sleep for a nap, taking a minute to put her feet up will be a welcome break! I thought it would be cute to add a fun twist to the wine socks, so I added “If you can read this, Baby Jax is sleeping!”
So cute, right?
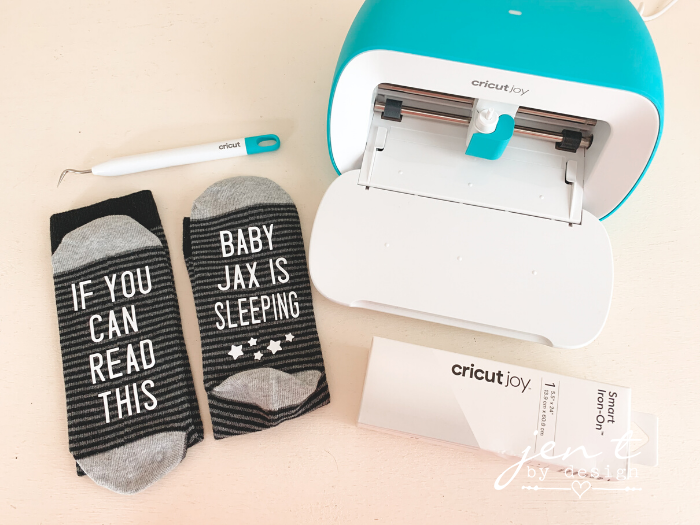
To Make these “Baby is Sleeping Socks” You’ll Need:
- Cricut Joy
- This project in Design Space
- Socks
- Smart Iron-On (I used white)
- Weeding Tool
- EasyPress or Iron
Open this project in Design Space, and just as you did for the shirts, determine your sizing and enter it into the top toolbar.
Click on the second sock design and click “Detach.” Delete Jax and add your own name. Select the entire design for that sock and click “Attach.” Click “Make It.”
Apply the designs to the socks just as you did for the shirts above.

We all know that once a baby arrives, finishing a cup of coffee before it gets cold is not an easy task. I chose to add an insulated mug that keeps coffee warm for hours to our New Mom Gift Box so that when she finally gets around to sipping her coffee, it will still be warm.
To customize it, I added a “Mom, est. 2020” decal.

To Make a New Mom Coffee Mug You’ll Need:
- Cricut Joy
- This project in Design Space
- Insulated Coffee Mug
- Cricut Joy Smart Vinyl (Permanent)
- Cricut Joy Transfer Tape
- Weeding Tool
- Scraper Tool

Begin by opening this project in Design Space. If you need to customize the year, simply click on the design, click “Detach,” edit the year, then select the entire image and click “Attach.” Click “Make It.”
Design Space will prompt you to choose the material, then to load the material and cut. Once the vinyl is cut, unload it and use the weeding tool to weed away the negative material.

Cut a piece of transfer tape large enough to cover the design. Peel the backing away, then place the transfer tape over the design. Use the scraper tool to rub over the design and help adhere the vinyl to the transfer paper. Peel away the vinyl backing.

Position the decal where you’d like it to be on the mug, then rub over the design well with the scraper tool. Peel away the transfer tape.

The permanent vinyl is sturdy enough to withstand hand washing but cannot go in the dishwasher.

And because a good smelling candle can really have a calming effect, when the new mama really needs to relax, I customized a candle for her to burn. Follow the same instructions as for the coffee mug, just use this project in Design Space.

One of my absolute favorite features of the Cricut Joy is how easy it is to make custom cards. I mean, would you look how pretty that is?!! You know what makes it even better? It was so FAST to make! And did I mention that the Cricut Joy can write, too?!! Gahhhh, I love this little machine!
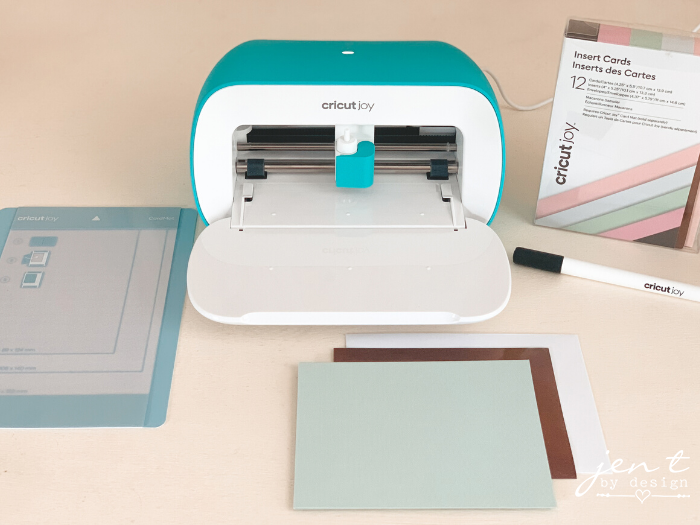
Card making is super easy with the Cricut Joy thanks to their Insert Cards and specialized Card Mat. The pre-folded cards slide right into the mat, then the machine can write on and cut the top page of the card while protecting the back page. After the card is complete, you simply insert a background card behind the cuts and you’re done! So easy and really classy looking!
To Make this New Mom Card You’ll Need:
- Cricut Joy
- This project in Design Space
- Insert Cards (I used the Macarons Sampler)
- Black Pen (included with the Cricut Joy)
- Card mat

To begin, open this project in Design Space. Remove the protective cover from the mat, then slide the bottom page of the card under the mat sleeve. Press the top page onto the sticky top side of the mat.

In Design Space, choose the appropriate card size, then follow the prompts to load the mat and pen.

Once the writing is complete, Design Space will prompt you to remove the pen and re-insert the blade. Click continue and the machine will cut out the design.

Unload the mat and peel the mat away from the card. Typically you can cut slices in the card design that allow you to slide the insert cards right into the slits without any adhesive being needed. For this design I didn’t want the slits, so I used some double-sided tape to attach the insert cards to the inside front of the card. I also used a glue stick to attach the inside pieces of some of the letters. Doesn’t that look so nice and classy? LOVE that easy card making capability!

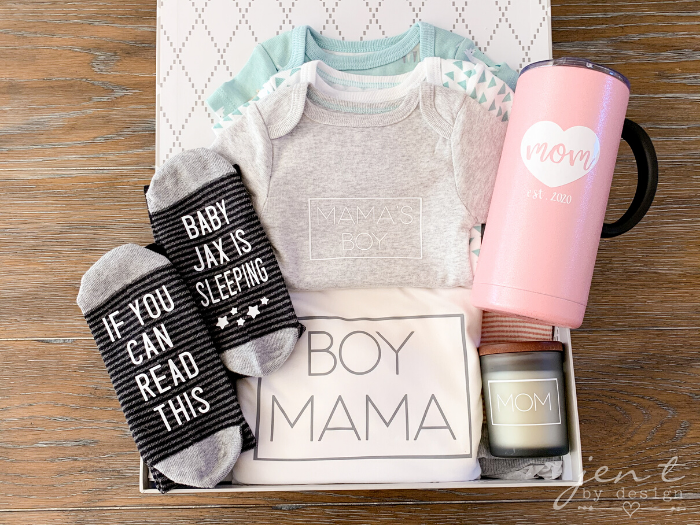
So, here’s everything all laid out together. Doesn’t it all look so cute? And it’s personal. My favorite kind of gift!
I’m still in awe of the fact that the Cricut Joy allowed me to make all of this within an hour. Isn’t that awesome?!! I think it’s a gift that any new mom would love to receive and I sure can’t wait to gift all of this to my baby girl. I hope she loves it!
The Cricut Joy is now available in stores and online. To learn more about this cute little machine and all of it’s capabilities, visit Cricut.com.