DIY Cinco de Mayo Shirt Using the NEW Patterned Iron-On from Cricut!
/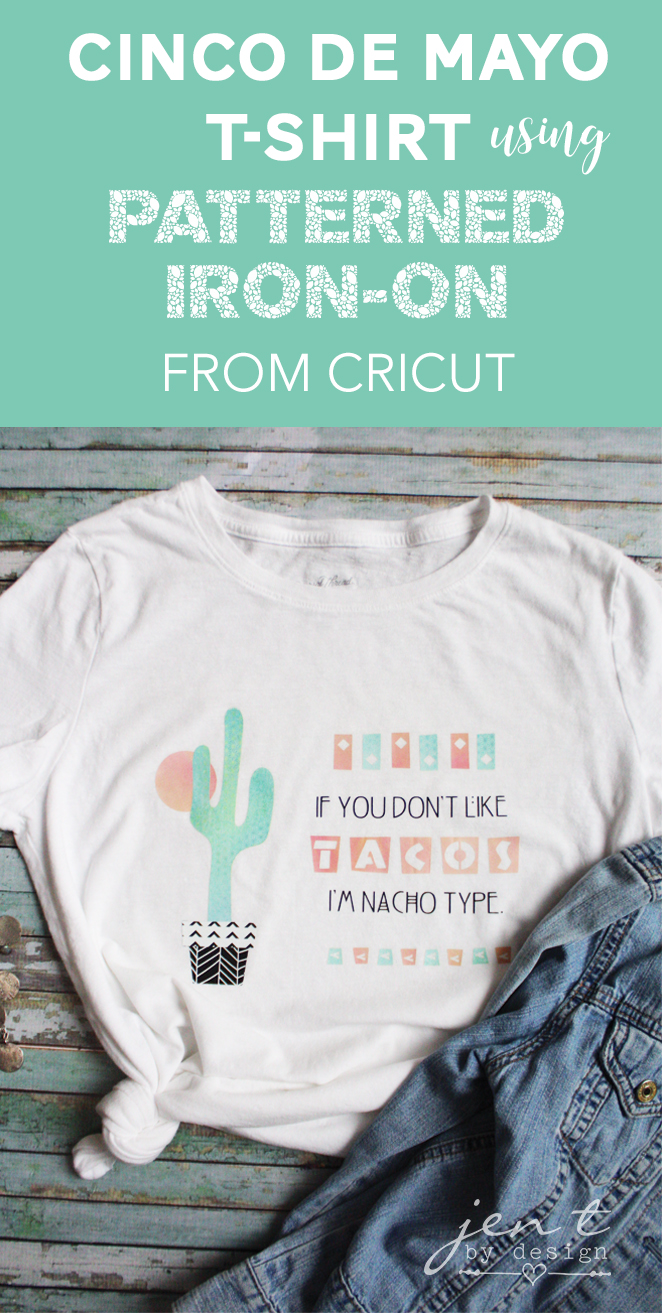
Bring on the chippin', dippin,' and margarita sippin' y'all! Cinco de Mayo is on it's way, and I can't wait! To celebrate the occasion, I created a fun little DIY Cinco de Mayo shirt, and it turned out so cute that I thought I'd share it with you. :)
All of my loves collided for this project, and I am obsessed.
What's got me so excited? Well, I got to use my Cricut Maker and Cricut EasyPress, which always make me happy. Then, I got to use the new Cricut EasyPress Mat, which is so convenient. But then, y'all...then...are you ready for this? I got to use the newly released Cricut Patterned Iron-On! They didn't release just any old patterns either, y'all. They released adorable patterns...including my absolute FAVE...watercolor iron-on!!!!!
This is a total game changer, you guys! We can mix and match patterns to create one-of-a-kind designs! I mean, just look at that cactus. The pattern on the iron-on adds so much more to the design!!!
The possibilities are endless, too. You can make fun shirts like this. You can use it on throw pillows in your home decor. How about making Mom a fun tote for Mother's Day? So darn exciting!!!
All in all, there are 9 sampler packs of patterned iron-on to choose from, each with three 12" x 17" sheets in three different designs, so there is something for everyone! I already have a list of things I want to make, but for now, let me walk you through making this fun Cinco de Mayo shirt!
How to Make a Cinco de Mayo Shirt using Cricut's new Patterned Iron-on
You'll Need:
- This project in Design Space
- A Cricut cutting machine. I used the Maker, but you can absolutely use whatever model you have, like the Explore Air 2
- A Cricut EasyPress or iron
- A Cricut EasyPress Mat or a towel to protect your work surface
- A plain white t-shirt
- Cricut Patterned Iron-On (yipppeee)!! I used the Nature Walk Basics Sampler, the Sunset Blossom Sampler, and the Aquamarine Sampler.
- Cricut Black Iron-On Lite
- Also, you don't have to have a weeder tool, but weeding is soooo much easier when you have one!

Loading and Cutting the Project
Begin by opening the project in Design Space and clicking "Make It."
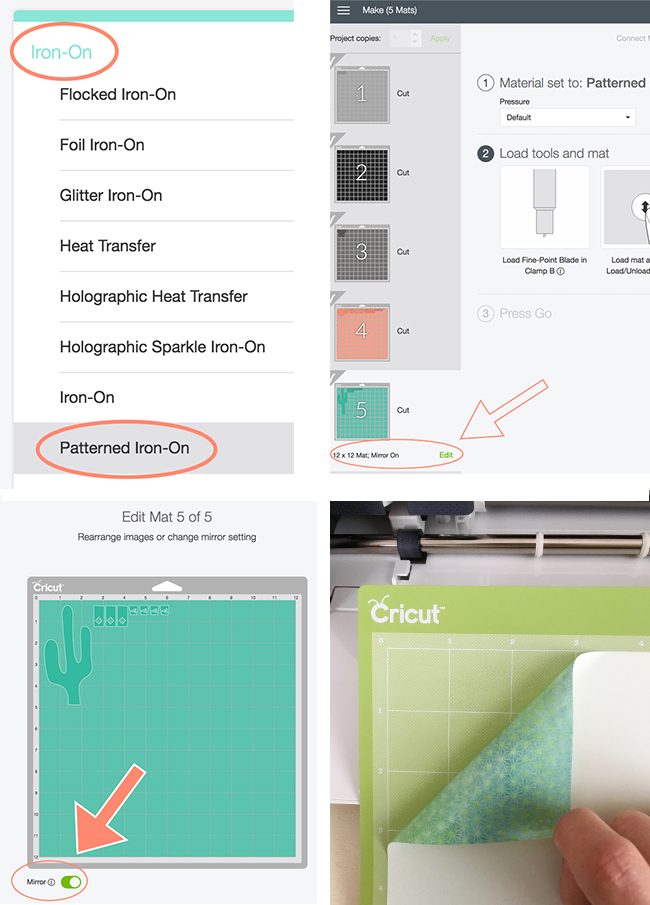
The program will automatically separate the mats by color, making it easy to identify which pattern to load onto the mat for each cut.
You will be prompted to choose the material that you're cutting. All of these cuts will be under the "Iron-on" category, and with the exception of the text, will be "Patterned Iron-On." For the text you'll choose regular iron-on.
IMPORTANT: Be sure to TURN MIRROR IMAGE ON FOR EACH MAT prior to cutting so that the images and text will display properly on your shirt. Also, make sure to put the patterned iron-on PRINT SIDE DOWN on the mat.
Follow the prompts on the screen and machine to cut each piece of material.

Weeding the Images for the Cinco de Mayo Shirt
Once all of your images and text are cut, it's time to weed! If you're new to Cricut cutting machines, "weeding" means removing the excess pieces of material that you don't need.
For the large pieces, this is easy...you simply peel away what you don't need. For the smaller, more intricate pieces, the Cricut weeder tool makes things much easier!
Once everything is weeded, use scissors to cut the excess carrier sheet (clear plastic) away from the iron-on. This will help in the next step.


Applying the Patterned Iron-On
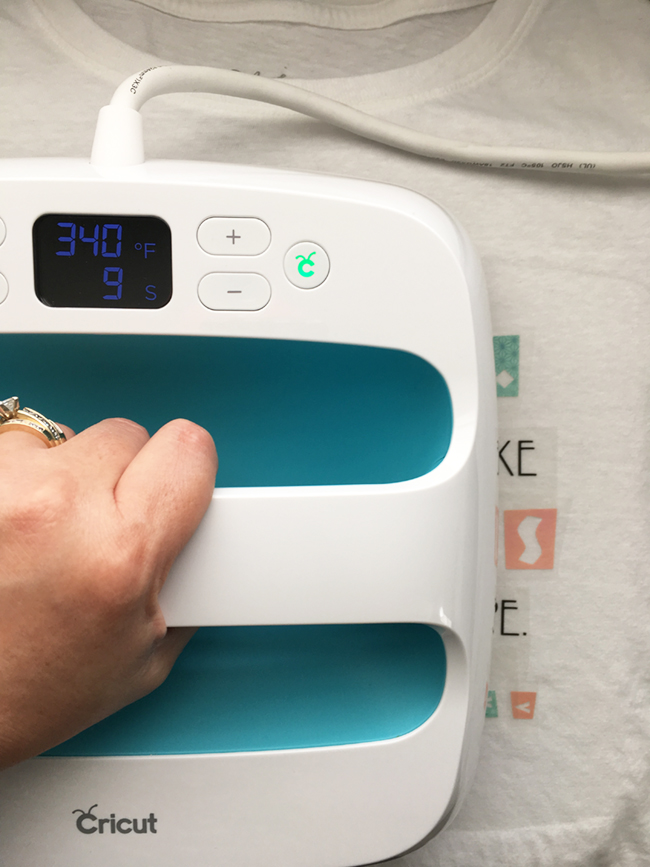
Preheat your EasyPress or iron. Refer to this chart for the heat settings for the EasyPress, or if using an iron, preheat the iron to the appropriate setting for the material of your shirt.
Choose a hard, flat work surface (a countertop is great), and protect it with a Cricut EasyPress Mat, or a towel that has been folded in half.
Arrange the cut pieces on a flat space near your work surface so that you can space them/place them how you'd like them to appear on your shirt.
PATTERNED IRON-ON SHOULD NOT BE LAYERED. While the iron-on looks as though it's layered, the cuts have actually been made so that the pieces fit like a puzzle. Piece them together accordingly to achieve the layered look.
Next, identify where you would like your design to be on your shirt. I like to use a tape measure to find the center between the armpits and determine how far down from the collar I'd like the design to be.
This next part gets a little tricky, so I'll share what I did to make it a bit easier for me. Refer to your design that you have laid out on your counter, and measure the dimensions of the cactus, pot, and sun. Cut a piece of scrap paper and lay it over that area on the shirt. This will help you with the placement of the next pieces.
Using that paper as a guide, arrange your text and aztec pieces on the shirt where you'd like them to be, making sure that the carrier sheet (clear backing) is trimmed enough to not overlap any of the iron-on pieces.
Once you've determined where they should go, move the pieces to the side, and heat that area of the shirt for 5-10 seconds.
Place the text and aztec images back on the shirt, making sure they are straight, remove the scrap paper, and press according to the EasyPress heat settings (my shirt required 340 degrees for 50 seconds) or 50 seconds with an iron. Flip the shirt over and heat the back of the garment for 15 seconds using firm pressure. LET COOL COMPLETELY.
Since the carrier sheet of the cactus, pot, and sun pieces will overlap, these pieces need to be added individually.
Starting with the bottom piece of the pot, preheat the area of the shirt where it will be placed, then adhere it following the same time frame as above, then press on the back side for 15 seconds. LET COOL COMPLETELY.
Peel the carrier sheet away, then place the next piece of the pot on the shirt. Protect the bottom piece of the pot by placing the carrier sheet back on top of it. Press the second piece of the pot to adhere it, trying not to re-press the bottom piece of the pot, then heat on the back. Repeat the process for the cactus and the sun. LET COOL COMPLETELY, THEN PEEL AWAY THE CARRIER SHEETS.
And there you have it! Now you are going to look sooooo cute while you're doing all that chippin', dippin', and margarita sippin', and when someone asks you where you got your adorable shirt (because they're totally gonna), you can say "I made it myself!
Happy Celebrating, and see ya next time! :)

How to Care for Your Project:
- Wait 24 hours after application to wash
- Turn inside out before washing and drying
- Do not bleach
- Iron inside out
If you like these ideas, please "Like," "Pin," "Share" or "Tweet!" Or, you can just shout it from the rooftops, if that's your thing. Thanks bunches!!! :)
This is a sponsored conversation written by me on behalf of Cricut. The opinions and text are all mine. Affiliate links are included in this post, which means If you purchase something through the link, I may receive a small commission at no extra charge to you.