DIY Bottle Wraps Using the Cricut Explore Air 2!
/
Did you catch the Watermelon First Birthday Party that I shared last week?
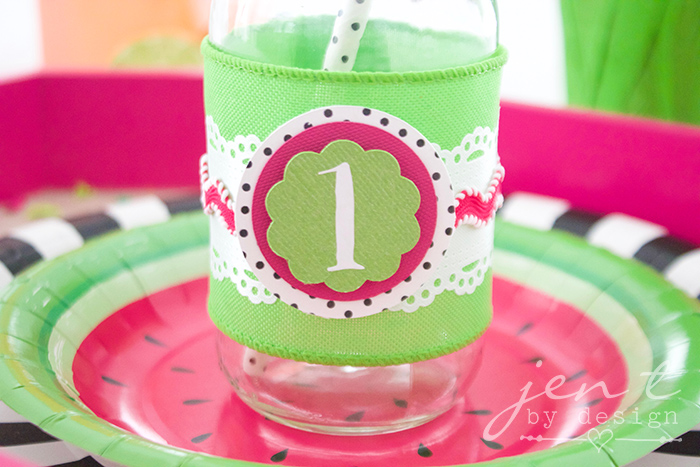
If so, you probably caught a glimpse of these super duper cute little DIY Bottle Wraps that I created with a little help from my brand spankin' new Cricut Explore Air 2.
You guys! If you want to add a little "pow" to you party decor, this is a sure bet! You can whip these bottle wraps up in a jiffy, and they're perfectly customizable! Use any colors/patterns you want to make them a perfect fit for your celebration!
Ready to get started? Let's do it!
You'll Need:
Milk bottles
Ribbon for layering (I used 2.5-inch, 1.75-inch, and ric-rac from Michaels)
Double-sided tape
Pop Dots

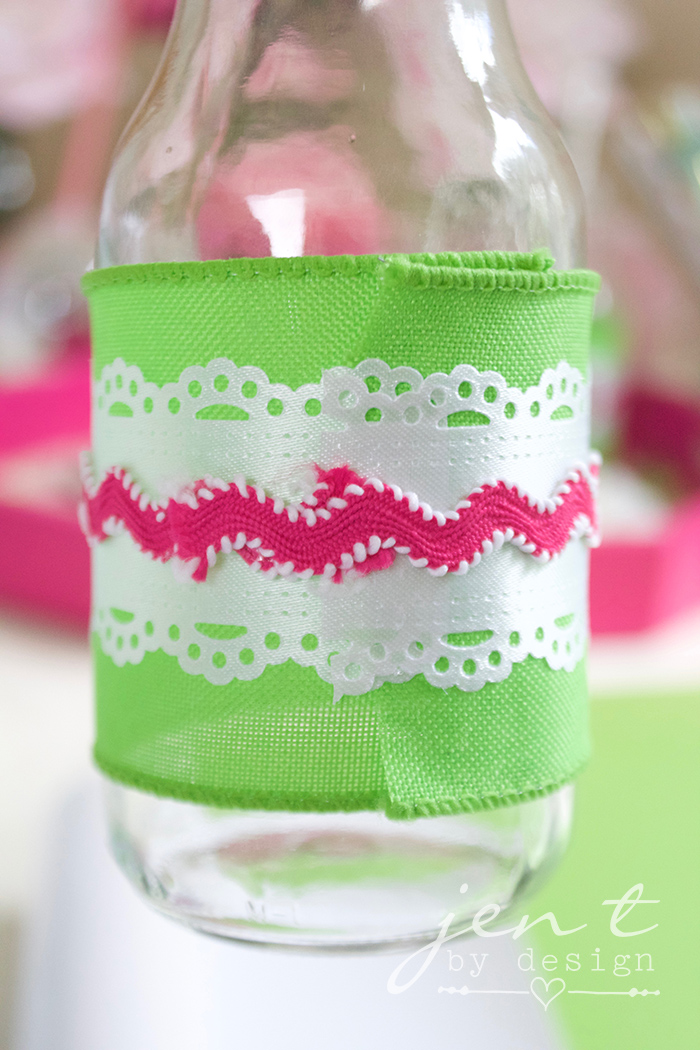
Start by cutting the ribbon into lengths long enough to wrap around your bottle and overlap just a bit in the back.
Center the ribbons around the bottle, starting with the widest ribbon and working your way through to the thinnest one. Secure each ribbon in place in the back using double-sided tape.
Now it's time to bust out the Cricut machine and let the magic happen!
You will need 3 layers of cardstock to create the look shown. Use your favorite mix of patterns/colors...the possibilities are endless! I used this black and white dot pattern, pink, and green.
We're going to start with the bottom layer, which is going to be a 1.75-inch circle.
Open Design Space and click on "New Project."
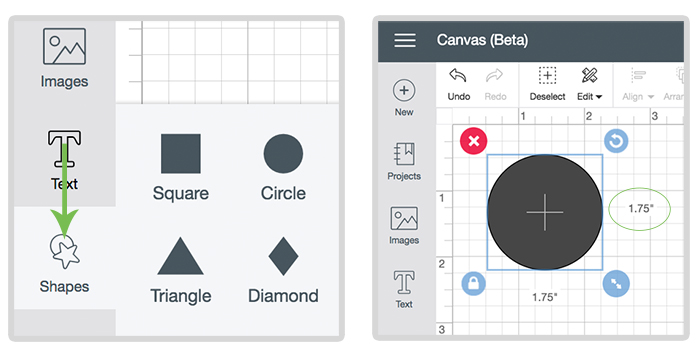
When your design board opens, click on "Shapes," then "Circle."
Create a circle, then use the arrows in the bounding box around your circle to size it to 1.75 inches. Click on "Make It" in the top right hand corner.
On the right hand side of your screen, choose the size and material that you will be cutting.
This next step is pretty cool! Once you're on the preview page, Design Space will duplicate your shape so that you can cut as many circles as you need all at once!
In my case, I'll be making four bottles, so in the "Project Copies" box in the top left corner, I'll choose "4," then "apply."
Design Space automatically adds three more identical circle to my cutting preview. Isn't that so awesome?!!

Now click "Continue" and follow the prompts on your screen.
In this instance, we are using cardstock, so be sure the dial on your Cricut is set appropriately.
Align your cardstock to the guide in the top left corner of your mat, then load your paper and hit the blinking "C" to go!

Once you're machine is done cutting, click "Finish." This will take you back to your design board.
Weed the excess paper off the mat so that your circles are still in tact. I like to place the mat upside down and bend it slightly to peel it off the paper. This helps keep the paper from bending. If your circles need some help getting unstuck from the mat, the Cricut spatula is great for helping lift them off the mat.
Back in Design Space, simply click on the circle that you've already made and use the arrows to resize it to 1.5 inches. Repeat the cutting process above.

Ok, now for the final "petal" shape, go back to your design board and delete the circle.
Save this file to your computer, then click "Upload" in Design Space. Click "Upload Image" then find the file on your computer and save it to Design Space.
Choose the "simple" image type > Continue > Continue > Save as Cut Image > Save.
Being sure that the image is highlighted, click "Insert Images." Resize the image to 1.25 inches wide (this can also be done manually in the top menu bar). Now follow the same procedure for cutting. Click "Finish."

Once back on the design board, don't delete the petal shape. Instead, click "upload" again and upload this image just like you uploaded the petal shape.
In the Layers menu on the right, click the circle beside the scissors on the "one" label and change the color to a color other than white.

Now move the one on top of your petal and size it to fit in the space like you'd like it to. I sized mine to 0.9 inches tall. Delete the petal shape. Since your number isn't white, you can still see it on the design board. :)
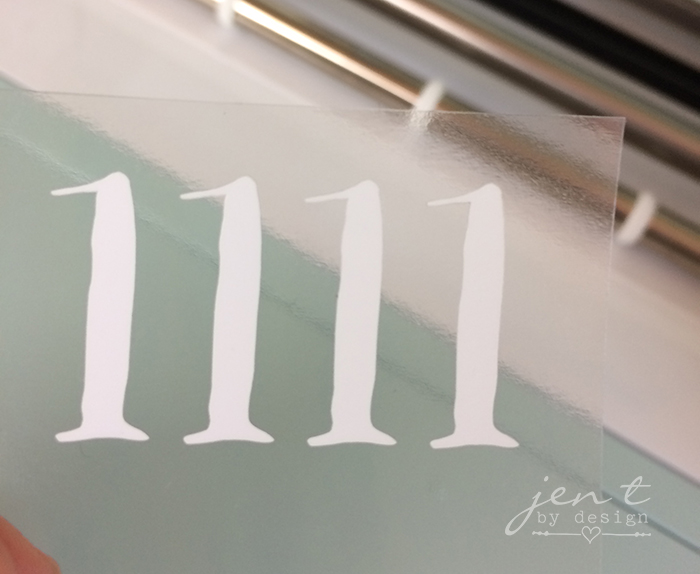
We'll be using vinyl for the ones, so you'll need to adjust the material dial on the machine before cutting. Follow the same cutting procedure to cut the numbers.
Adding the number to the petal shape will require some weeding and transfer tape.
First, use scissors to cut around the numbers to elimate the excess vinyl. Then, peel the negative vinyl away from the numbers, being sure the numbers stay adhered to the backing. Use the weeding tool, if necessary. You should be left with the vinyl backing and just the ones.
Cut a piece of transfer tape slightly larger than your vinyl backing piece. Peel off it's backing, and place the transfer tape, sticky side down, on top of numbers. Now slowly peel away the vinyl's backing, once again using the weeding tool to keep the ones in place, if necessary. You should be left with transfer tape with only the numbers adhered to it.
Next, cut the numbers into individual pieces. Center the numbers onto the petal cardstock pieces, then remove the transfer tape. Voila! How cool is that?!!!

Now we just need to put everything together and we're done!
Use double-sided tape to center the pink circle onto the dotted circle. I used a pop dot to adhere the petal circle to the pink circle because I wanted to add a little bit of dimension, but you could totally just use double-stick tape, if you'd rather.
Then just use another piece of double-stick tape to adhere the creation to the bottle. All done, and super cute!!! :)


So, there you have it! Easy peasy and super cute! :)
I also used the Cricut Explore Air 2 to create the backdrop sign for this party, the cake topper, the watermelon favor bag toppers, and I used it to cut out the cupcake toppers and favor tags.
This machine is life-changing, y'all, and I'm obsessed!!!
Enter to win your very own Cricut Explore Air 2 here!
If you like these ideas, please "Like," "Pin," "Share" or "Tweet!" Or, you can just shout it from the rooftops, if that's your thing. Thanks bunches!!! :)
I was invited to participate in the Cricut Party Blogger Program Kickoff.
This experience is based strictly on my opinion. Others may have a different opinion or experience with the product listed above. I was provided the sample free of charge by the company or PR agency and I have given my honest opinion.
This is a sponsored conversation written by me on behalf of Cricut. The opinions and text are all mine. Post contains affiliate links.